WooCommerce allows a store or venue to integrate their current Idealpos Stock Items into an online store.
The current setup of Stock Items in Idealpos can be sent to WooCommerce by simply enabling the Web Store.
Stock Items can be sent to the Web Store with tags, variants (such as shirts that are available in different colours and sizes) and manage the Stock Levels of each Stock Item.
Note!
Part of this process may need to be completed by Idealpos.
Resellers can Create the Rest API within the site's WooCommerce, then send the details to interfaces@idealpos.co for the rest of the installation to be configured by Idealpos.
To configure and enable the integration between Idealpos and WooCommerce, there are three parts which are outlined as follows.
You can quickly skip to a specific part of the setup process by clicking on one of the following links:
Create the Rest API within WooCommerce
Add WooCommerce Store to Idealpos eCommerce
Setup eCommerce Service in Idealpos Online
1. Request the WooCommerce credentials from the venue.
Example:
http://staging-woocommerce.azurewebsites.net/demo/wp-admin
Username: Idealpos
Password: adcd1234
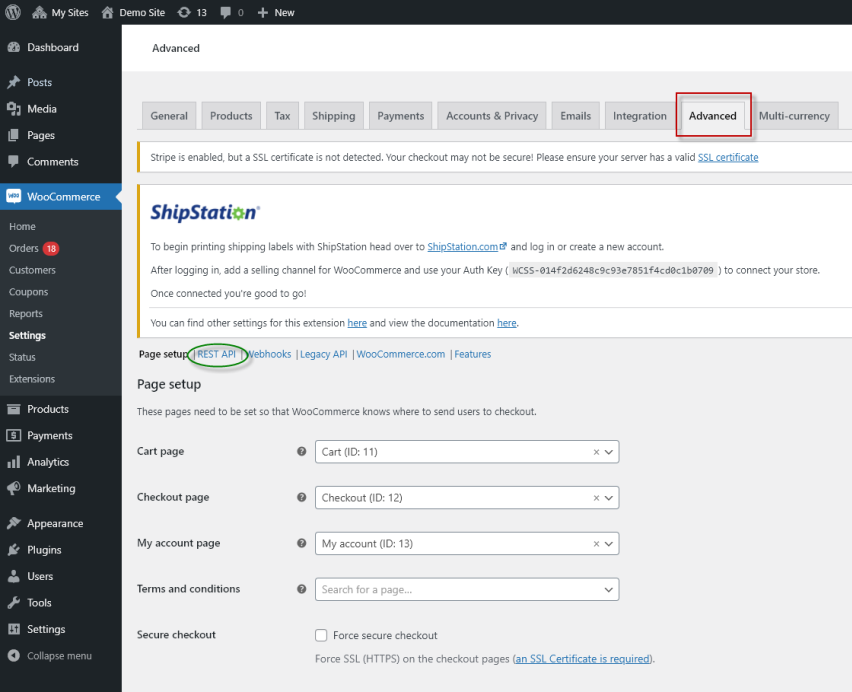
2. Within the dashboard on the left-hand side, column click on WooCommerce > Settings.
3. Within the WooCommerce Interface, click on the tab Advance followed by "REST API".
4. Within the REST API Interface, click on "Add Key".
Fill in the details, ensure that you change the permissions to "Read/Write" and then click on "Generate API Key".
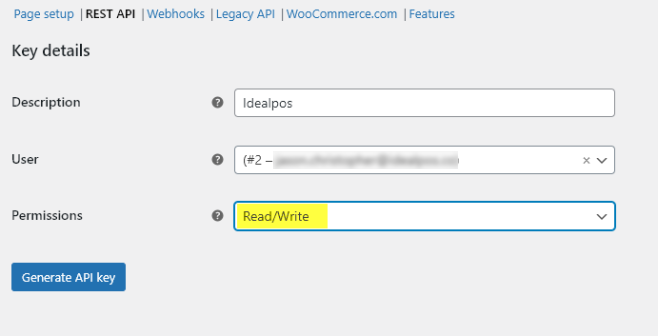
5. Take note of the Consumer Key and Consumer secret as this will be required for setting up the store in Idealpos eCommerce.

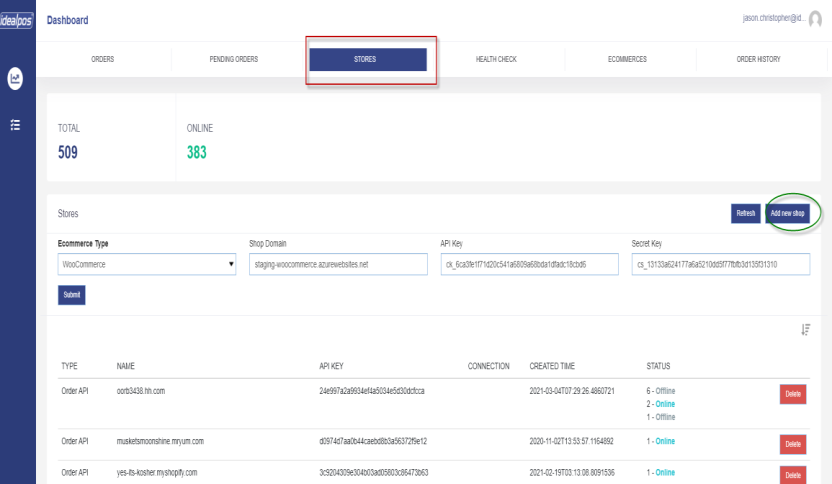
1. Log into https://ecommerce.idealpos.co/
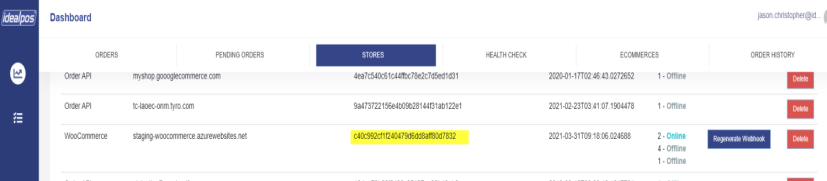
2. Click on the "STORES" tab and then "Add new shop".
3. Change the Ecommerce Type to WooCommerce, enter the shop domain, the API, and Secret Key which you retrieve from the venue or store's WooCommerce API Setup.
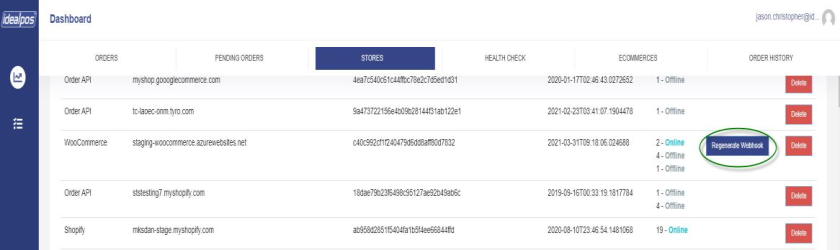
4. Once the new store is added, you need to find the new store and click on "Regenerate Webhook".
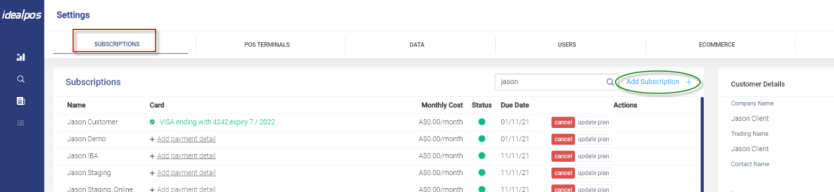
1. Log into https://online.idealpos.com.au/
2. Within the Subscriptions tab, click on "Add Subscription".
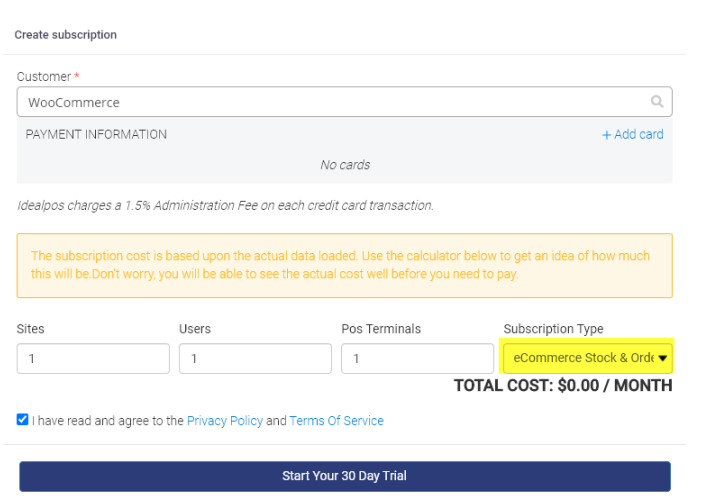
3. Within the Subscription Interface, find the customer in the Customer field, ensure that you select eCommerce Stock & Orders in the Subscription type, and tick the "I have read and agree to the Privacy Policy and Terms of Service".
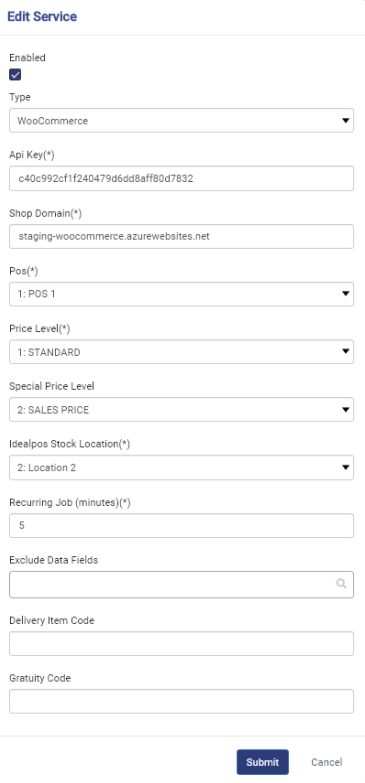
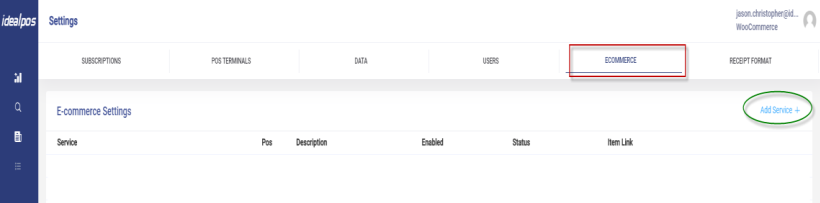
4. Once the subscription is synced, click on the eCommerce tab and then "Add Service".
5. Within the service setup, fill in all the details.
The API Key is found in https://ecommerce.idealpos.co, in Stores.